Home Assistant: the sensors I run, and the hard ones (water, oil, electricity)
Table of Contents
I’ve been slowly wiring up the house with sensors for a year now, and the thing tying it all together is Home Assistant. This post is a tour of what I actually run: the sensors, the software behind each one, and — more usefully — the awkward real-world details and downsides I hit along the way. Some of these problems (a water meter buried in a pit, an oil tank at the bottom of the garden, a smart electricity meter that won’t just tell you anything) took far more effort than they had any right to.
Why Home Assistant#
I chose Home Assistant Operating System (HAOS) — the appliance-style install that bundles the OS, Supervisor and add-ons — running in a small libvirt VM. A few reasons it won out:
- It’s open source. No cloud dependency, no subscription, and my data stays on my LAN. The whole thing runs on a 2 vCPU / 4 GiB VM.
- It supports every sensor I threw at it. Zigbee, Thread/Matter, MQTT, plain RF via SDR — if a thing emits data, there’s usually a way in.
- It integrates the commercial kit I already own. My Meross plugs and leak sensor, and my Ubiquiti network gear and UniFi Protect cameras all show up as first-class devices.
- It’s genuinely easy to extend and fix with Claude Code. When something breaks — and with this many moving parts, something always breaks — I can point Claude Code at the VM, the config, and the logs and have it troubleshoot end to end. A big chunk of this post exists because of exactly that.
- It lets you bolt on cheap sensors for hard problems. The best example is my water meter: rather than pay for a “smart” meter I don’t own, a ~£30 SDR dongle reads it out of the air. More on that below.
What I’m running#
Here’s the current inventory — the physical sensor on the left, and the Home Assistant integration or add-on that brings it in on the right.
| What it measures | Hardware | Home Assistant integration / add-on |
|---|---|---|
| Boiler-room water temperature | SONOFF SNZB-02LD (Zigbee) | ZHA via a Sonoff Zigbee 3.0 dongle |
| Water leak | Meross smart water leak sensor | Meross (meross_lan) + Meross Local Broker add-on |
| Whole-house water consumption | Diehl Hydrus meter, read over wM-Bus (868 MHz) | RTL-SDR + rtl_433 + wmbusmeters on a remote Pi → MQTT |
| Oil tank level | Apollo Ultrasonic sender (433.92 MHz) | Same RTL-SDR + rtl_433 → MQTT |
| Electricity import/usage | Smart meter via a Hildebrand Glow display | MQTT (see the downsides section) |
| Heating / hot water | Hive | Hive |
| Network + WiFi clients | Ubiquiti UniFi | UniFi Network |
| Cameras | Ubiquiti UniFi Protect | UniFi Protect |
| Smart plugs / switches | Meross | Meross (meross_lan) |
The glue underneath most of the interesting sensors is MQTT (the Mosquitto broker add-on). Anything that isn’t a native integration — the water meter, the oil tank, the electricity data — gets published to MQTT and Home Assistant picks it up from there. It’s the universal adapter for DIY sensors.
The Daily dashboard#
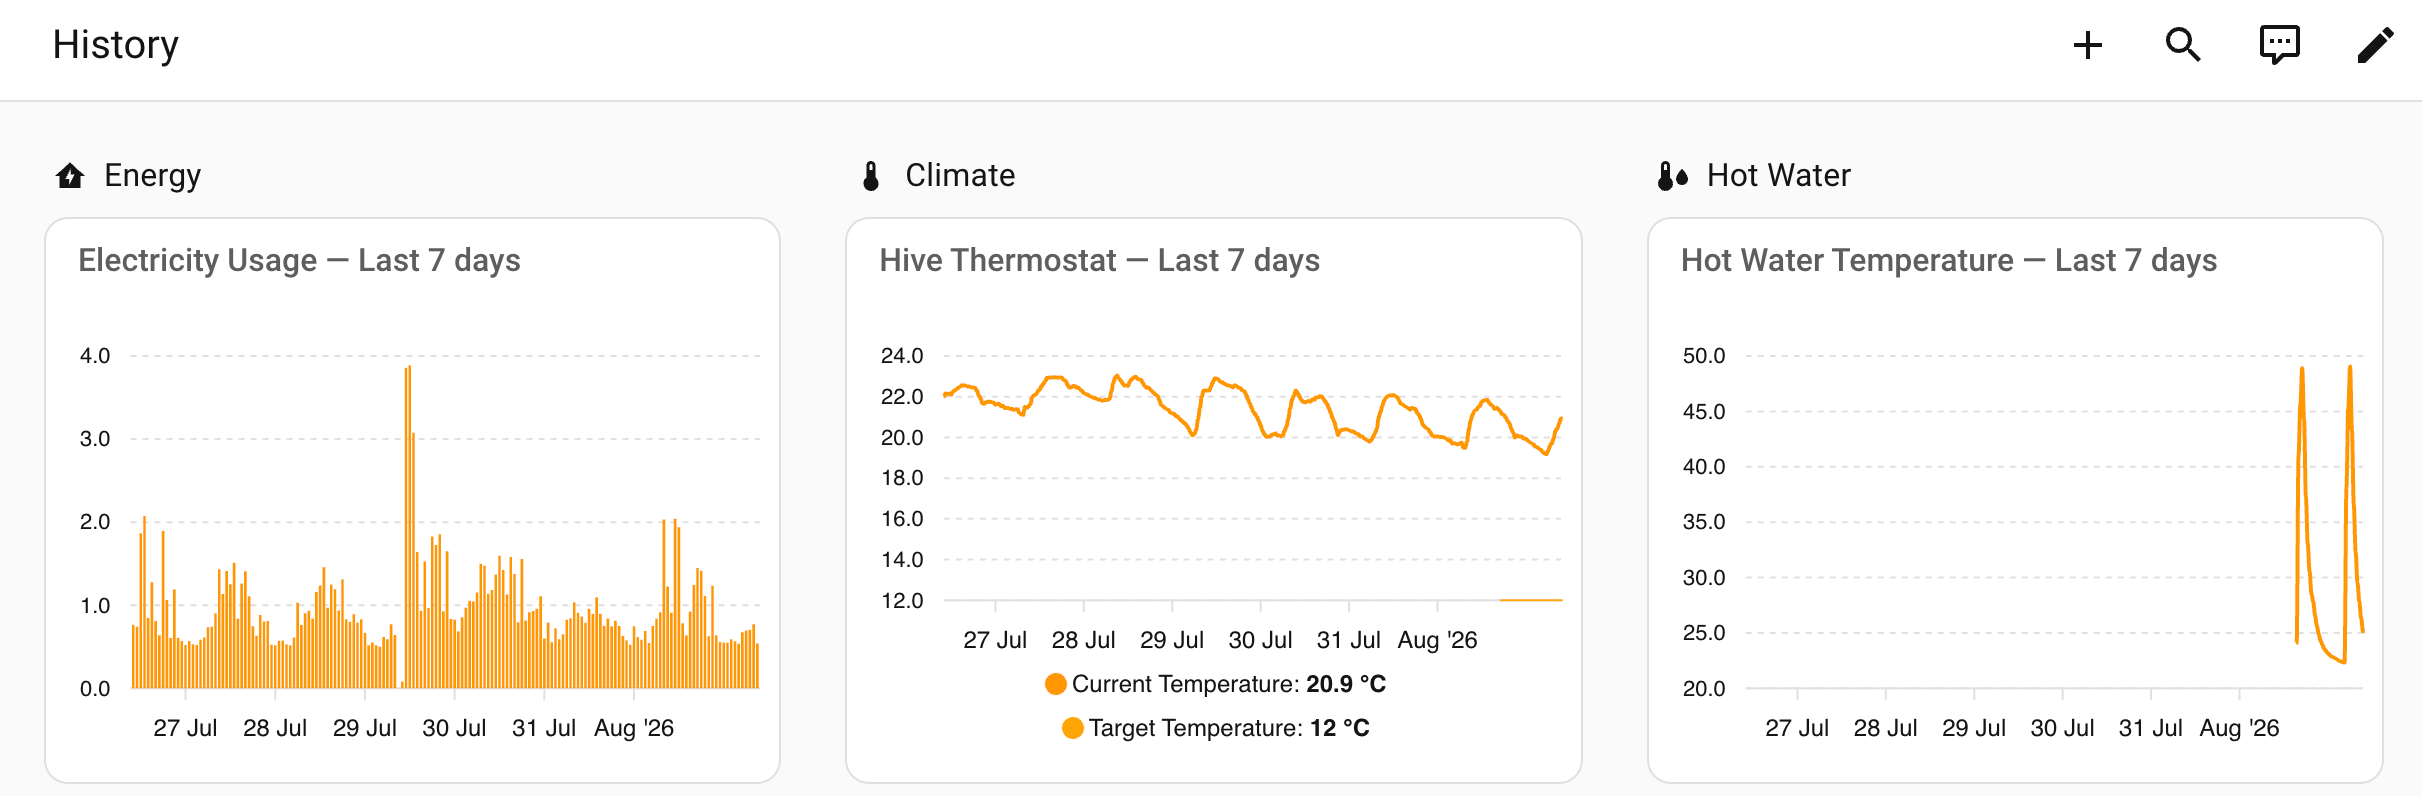
Most of this lands on one screen I actually look at — my “Daily” dashboard. Water temperature, oil level, electricity draw, the weather and the day’s bits and pieces all in one place:
The interesting sensors (and their downsides)#
The native integrations are boring in the best way — you click through a config flow and they work. The DIY sensors are where all the fun and pain live.
Reading a buried water meter with an SDR#
I don’t have a “smart” water meter in any official sense. What I do have is a Diehl Hydrus meter sat in a pit under a cast-iron lid, which happens to broadcast its reading over wireless M-Bus (wM-Bus) on 868 MHz. Helpfully, my water company’s deployment sends those telegrams unencrypted, so with the right radio you can just… listen.
The “right radio” is an RTL-SDR dongle — a ~£30 software-defined radio — running rtl_433 to demodulate the RF and wmbusmeters to decode the telegram into an actual litres reading, which then gets published to MQTT.
The catch is proximity. The meter is 5–20 m from the house, down in a pit under a metal lid, transmitting at low power. There is no chance of reading it from indoors. The only way I get a reliable signal is to put the SDR on a remote Raspberry Pi parked as close to the pit as I can get it, with the antenna practically on top of the lid. The Pi does the demodulation locally and ships the decoded reading back over the network. The same Pi and the same SDR also pick up my oil tank sender (an Apollo Ultrasonic unit at 433.92 MHz), which is likewise at the bottom of the garden, nowhere near the house.
So one cheap Pi + one cheap SDR gets me two otherwise-unreadable sensors. That’s the good news.
Downside: one antenna, two bands, and lost frames#
The bad news is that I’m being cheap with a single SDR covering two different frequency bands — 868 MHz for the water meter and 433 MHz for the oil tank — by frequency-hopping. The antenna I’ve got is a telescoping dipole, and its length is currently tuned for the 433 MHz oil sensor, which leaves 868 MHz reception marginal.
The practical result is dropped frames. The water meter only sends an idle “heartbeat” every 30–40 minutes, and with a marginally-tuned antenna I miss a good fraction of them. It’s fine for a slowly-changing whole-house total, but it’s a reminder that going cheap has a cost — here it’s paid in reception. A proper dual-band setup (or a second SDR and a correctly-tuned 868 MHz antenna) would catch far more of them. That’s on the to-do list.
Downside: resilience is hard when your sensor is three hops away#
Chaining SDR → rtl_433 → wmbusmeters → MQTT → Home Assistant, across two machines, means there are a lot of links to break — and I’ve broken most of them at one point or another:
- The VM’s virtual network interface silently dropped off its bridge, taking Home Assistant off the network entirely. Everything downstream went dark.
- The Zigbee USB dongle re-enumerated after a glitch, and the VM’s USB passthrough was still pointing at the old device — so the entire Zigbee network went unavailable.
- When the MQTT broker briefly vanished, the
rtl_433process on the Pi hung rather than reconnecting — and because the process was still technically “running”, nothing restarted it. Readings just stopped, quietly.
None of these are Home Assistant’s fault — they’re the seams between the DIY bits — but they’re the reality of a homegrown setup. I’ve since hardened each one (a watchdog that restarts rtl_433 if it goes quiet, a local MQTT broker on the Pi that buffers readings while the house is unreachable, and auto-recovery for the network bridge and the USB passthrough), but the lesson stands: the more cheap-and-cheerful hops you add, the more failure modes you own. A blog post on that hardening is coming separately.
Downside: the electricity meter that makes you pay to read it#
You’d think the easiest of the lot would be electricity — it’s a smart meter, it’s right there. But UK smart meters don’t just hand you your consumption locally. To get real-time electricity data streamed onto my LAN I had to buy an in-home display — specifically a Hildebrand Glow display, which pairs with the smart meter’s Zigbee network and republishes the readings over local MQTT.
It works well and the data is genuinely real-time (down to current wattage), but it grates a little that the only way to read a meter I’m already paying for was to buy an extra ~£70 gadget. Once it’s in, though, it feeds straight into Home Assistant’s Energy dashboard over MQTT like everything else.
Wrapping up#
The pattern across all of this: native integrations (Meross, Ubiquiti, Hive, the TVs) are effortless, and the hard, interesting problems — a buried water meter, an oil tank down the garden, a stubborn electricity meter — all come down to getting the data onto MQTT one way or another, whether that’s an SDR on a remote Pi or a display gadget you grudgingly bought. Home Assistant doesn’t care how the data arrives; it just needs a way in.
Being able to lean on Claude Code to build, debug and harden the DIY half of this has made the whole thing far more maintainable than it has any right to be. If you’re on the fence about self-hosting your home automation, the openness is worth it — just go in knowing that every cheap shortcut is a future troubleshooting session waiting to happen.